Log Cabin Heart Block Settings
Setting Ideas for the Log Cabin Hearts
SEWING TIPSLTSGUILD IDEAS
But what will the winner do with all those blocks? This was a discussion we had a few weeks ago. What do you do with all your blocks? How do you put them together? The way you put them together is called a “setting”. There are many different ways to do this. Here are a few suggestions that I like, for this particular block.
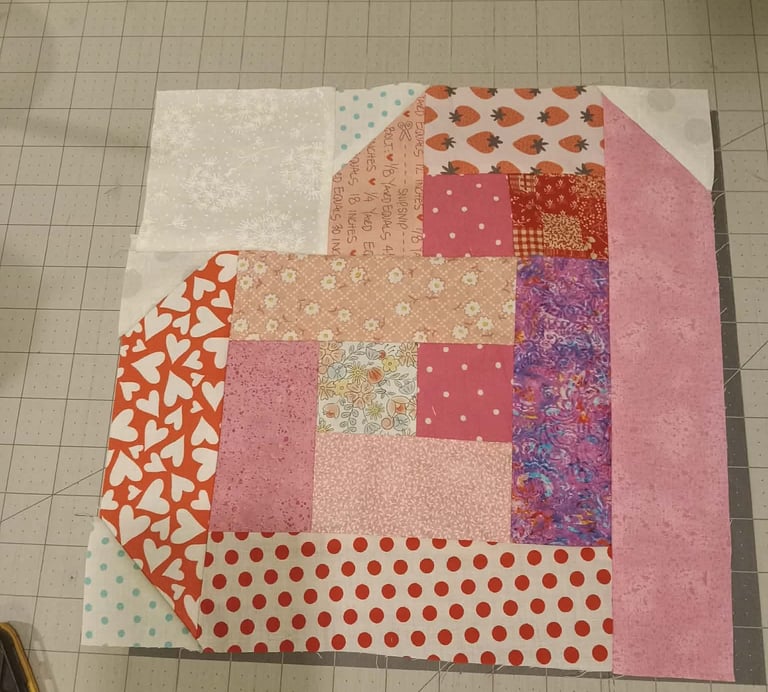
This month’s Block Lotto Block for the Loose Threads Society is the Log Cabin Heart Block from Netherland Stitches. I originally found it on Pinterest, and it looks like the designer took down the design because so many people were sharing the instructions. I will not share the instructions here, but if you want to find them, they are available.
Each group member will enter as many scrappy blocks as they want. The only rules are that the background should be white(ish) and that the heart pieces should be shades of red, pink, or purple. At our next meeting, each member will get their name in the bowl for each block they bring. Depending on how many entries we get, one (or maybe 2) lucky lady will get to take home the blocks.
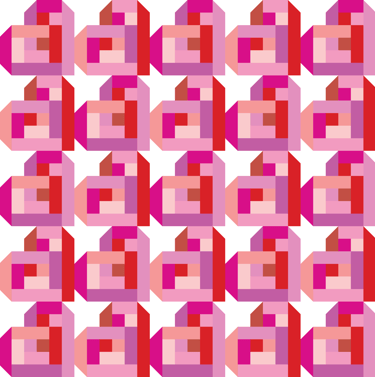
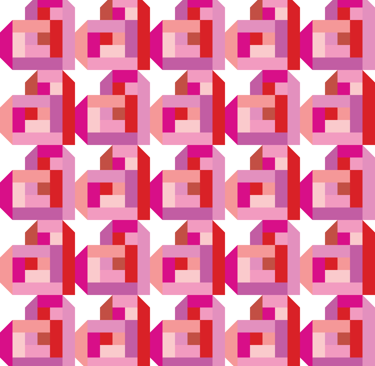
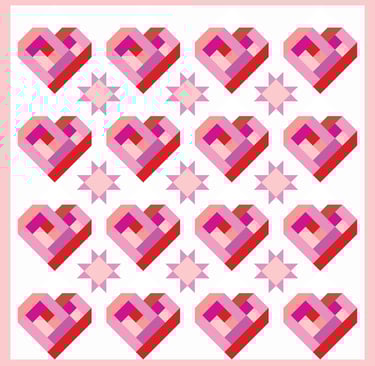
No Sashings, Just sew them all together
The easiest way to make a quilt out of all these blocks is to just sew them all together. Notice how they are all facing the same way, but they also blend in to the next one?
They do make an interesting star where they meet. This is called a “secondary pattern” but I dont’ think it’s worth it to loose the hearts.
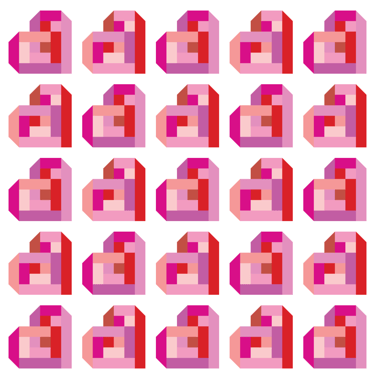
Same thing, but with Sashing
Sashing is the thin strips you put between the blocks. I think these blocks benefit from a white (or background color) sashing. This helps to keep each heart separate from the next. This is very simple, and does not look bad at all. Sashings are also good if you need to make your quilt a little bigger but don’t have any more blocks. But what else can we do?

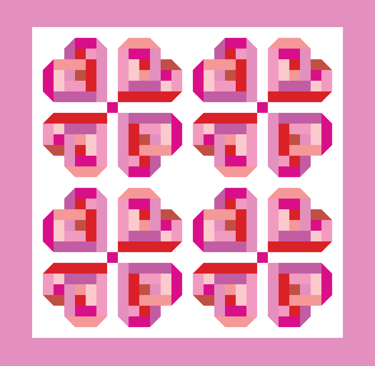
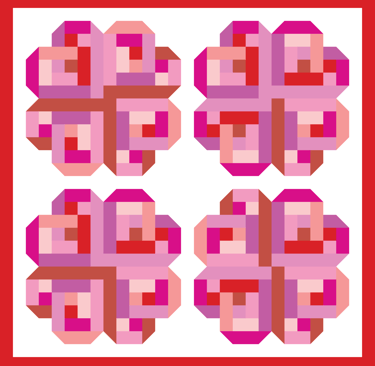
Rotate! Add Cornerstones. Add a border
Cornerstones are the tiny little squares between each sashing section. In this example, I rotated the blocks to form little flowers and added a red cornerstone as the middle of the flower.
I also added a thin white strip around the entire thing, then framed it with a wide pink border. Notice how different this looks than the previous examples? It was just some simple rotation.
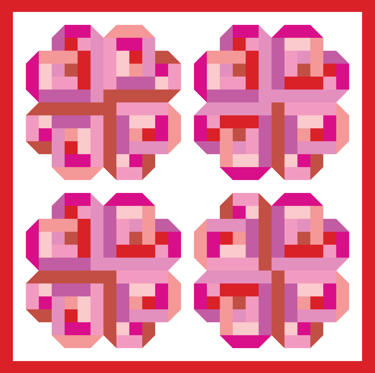
Rotate! No sashing/cornerstones.
You can achieve another more fuller flower look by taking out the sashings and cornerstones
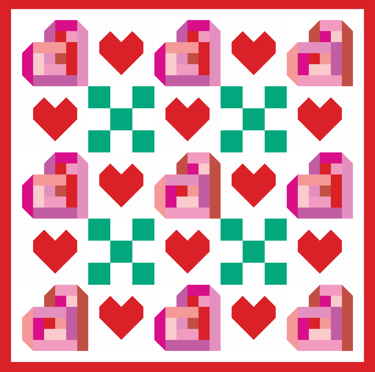
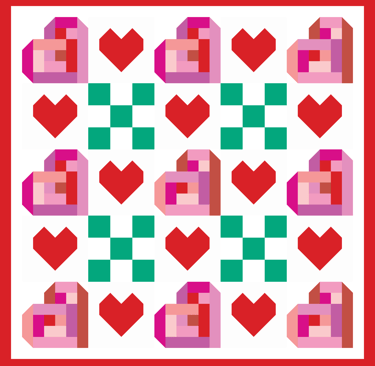
Add other blocks
Here you can see that I added a green 9-patch and an alternate Heart block. A style like this work well if you don’t have many blocks, but want to make a larger quilt. You could add any block you like. Sashings, or no Sashings. It’s your quilt, it’s up to you!

Getting Fancy! On-Point!
Now to address the elephant in the room. No one wants sideways hearts. Well maybe you do. But I know someone is also wondering how to get them to stand up. Well, this technique is called “On-Point” because the blocks are all turned 45 degrees and are now standing on their little tippy toes. I once again alternated with a different block, and added a thin border to frame it (and also so you could see it on this white background!) I’m not going to teach you how to put things on-point, but here’s a video that might help you.
I hope this helps! See you later!
Contact
tiffany@tialynndesign.com
© 2012-2026. All rights reserved.